Ultimate Guide to Building & Assembling the Wooden Playhouse 657948c3
Introduction to Instructions Wooden Playhouse 657948c3
A wooden playhouse is more than just a backyard structure; it’s a magical space where kids can let their imaginations run wild. Whether it’s a secret hideout, a cozy cottage, or a mini-adventure zone, a well-built playhouse can provide hours of fun. If you’ve purchased the Wooden Playhouse 657948c3, you’re in for an exciting DIY project!
In this detailed guide, we’ll walk you through every step of the process, from unboxing and preparing your materials to assembling and adding the finishing touches. Whether you’re a seasoned builder or a first-time DIYer, we’ve got you covered. Let’s dive in!
Why Choose Wooden Playhouse 657948c3?
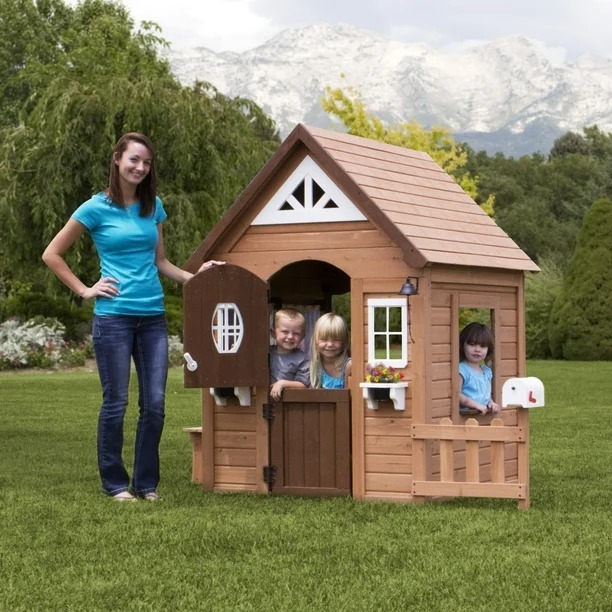
There are many playhouses on the market, but the Wooden Playhouse 657948c3 stands out for its durability, aesthetic appeal, and easy assembly. Here’s why it’s a great choice:
✅ High-Quality Wood: Made from premium, weather-resistant wood.
✅ Spacious Design: Offers ample space for multiple kids to play.
✅ DIY-Friendly Assembly: Comes with pre-cut parts and detailed instructions.
✅ Safe & Sturdy: Features rounded edges and a stable foundation.
✅ Customizable: Easy to paint, decorate, and personalize.
Essential Tools & Materials
Before you start, make sure you have the following tools and materials ready:
Tools Needed:
- Cordless drill
- Screwdriver set
- Hammer
- Measuring tape
- Level
- Saw (if needed for custom modifications)
- Sandpaper
Materials Included in the Kit:
- Pre-cut wooden panels
- Screws and nails
- Hinges for doors and windows
- Roof panels
- Instruction manual
Pre-Assembly Preparations
Before jumping into assembly, follow these steps to ensure a smooth build:
- Choose the Right Location – Pick a level surface in your backyard.
- Prepare the Ground – Clear debris and level the area if necessary.
- Unbox & Inspect Parts – Check that all parts are included.
- Read the Instructions – Skim through the manual for a general idea of the process.
- Gather Your Tools – Keep everything within reach to avoid interruptions.
Step-by-Step Assembly Instructions
Step 1: Unboxing & Checking Parts
- Open the packaging and lay out all parts.
- Cross-check the list of included materials.
- Inspect for any damage or missing pieces.
Step 2: Preparing the Base
- Place the foundation beams on the leveled ground.
- Ensure they are evenly spaced and aligned.
- Secure them with screws for stability.
Step 3: Assembling the Walls
- Start by attaching the back wall panel to the base.
- Secure the side walls using the provided screws.
- Ensure everything is level before fully tightening.
Step 4: Installing the Roof
- Carefully position the roof panels on top of the structure.
- Secure with screws, ensuring an even fit.
- Optionally, add shingles or waterproof coating for extra protection.
Step 5: Adding Doors & Windows
- Attach hinges to the door and secure it in place.
- Install window frames and ensure they open/close smoothly.
- Sand any rough edges to prevent splinters.
Step 6: Final Touches & Safety Checks
- Tighten all screws and bolts.
- Smooth out any rough edges with sandpaper.
- Apply a weatherproof sealant if necessary.
- Double-check stability and make necessary adjustments.
Safety Tips & Maintenance
To keep your playhouse safe and long-lasting, follow these tips:
- Inspect regularly – Check for loose screws and worn-out parts.
- Apply protective coating – Protect against rain and sun damage.
- Keep it clean – Remove dirt, mold, or debris to maintain its appearance.
- Teach kids safety rules – Ensure they use the playhouse responsibly.
Creative Ideas for Customization
Make the playhouse unique with these fun ideas:
🎨 Paint it in fun colors – Let your kids choose their favorite theme.
🪟 Add curtains & cushions – Create a cozy indoor space.
🌿 Decorate with plants – Hang flower pots for a cute cottage look.
🔦 Install LED lights – Perfect for evening playtime.
🏴☠️ Turn it into a pirate ship – Add a flag and steering wheel for adventure!
Common Problems & Troubleshooting
Problem: Panels don’t align properly.
- Solution: Loosen screws slightly and adjust before tightening fully.
Problem: Door doesn’t close smoothly.
- Solution: Check hinge alignment and sand any rough edges.
Problem: Roof leaks during rain.
- Solution: Apply waterproof sealant or add shingles.
FAQs
How long does it take to assemble?
On average, it takes 4-6 hours with two people.
Can I paint the playhouse?
Absolutely! Use outdoor-safe, non-toxic paint for best results.
Is it safe for younger kids?
Yes, but always supervise toddlers and ensure safety modifications if needed.
Can it withstand bad weather?
It’s designed for outdoor use but adding a sealant will increase durability.
What’s the weight limit?
It can typically support multiple children up to 200 lbs.
Conclusion
The Wooden Playhouse 657948c3 is a fantastic addition to any backyard, offering kids a fun and creative play space. By following these step-by-step instructions, you can ensure a smooth assembly process and long-lasting enjoyment. With proper maintenance and a touch of customization, this playhouse will provide years of adventure and joy. Happy building!
For a visual guide on assembly, you can refer to the following video: